HOCKEY NETCAM®
You Miss 100% of the Shots You Don't Take
Installation
Under NHL guidelines, the TV camera must be at least 18" from the ice surface and the still netcam must be at least 6" off the surface of the ice.
HEADS UP: Only the smallest fisheye lenses will fit in this box....Canon 15mm 2.8, Nikon 16mm 2.8, Sigma 15mm 2.8. Larger lenses will NOT fit. The maximum depth inside the box is 5-15/16" from front to back.
NETCAM 3.1 instructions
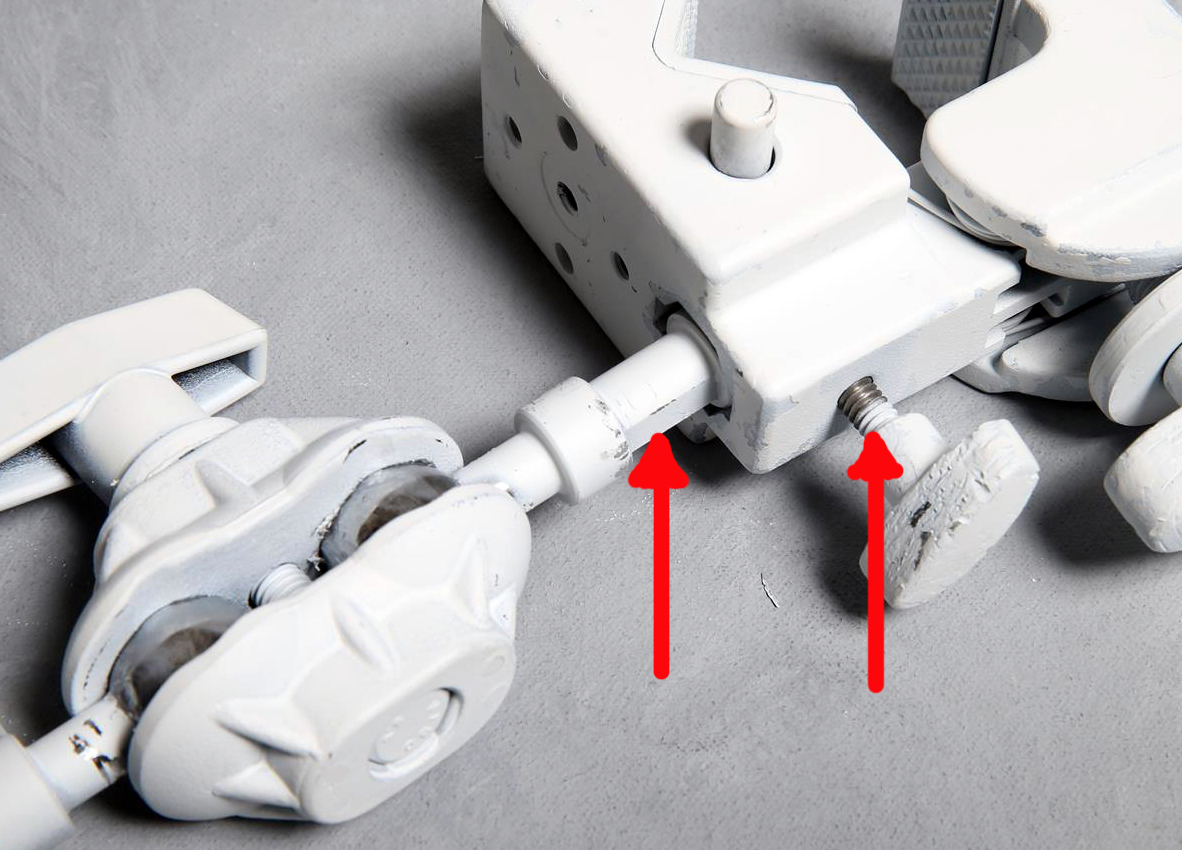
The base assembly attaches to a ball/swivel head and super clamp using two screws and tooth washers. Netcam 3.1 mounts centered on the pole in the back of the net approximately 6-10" off the ice.
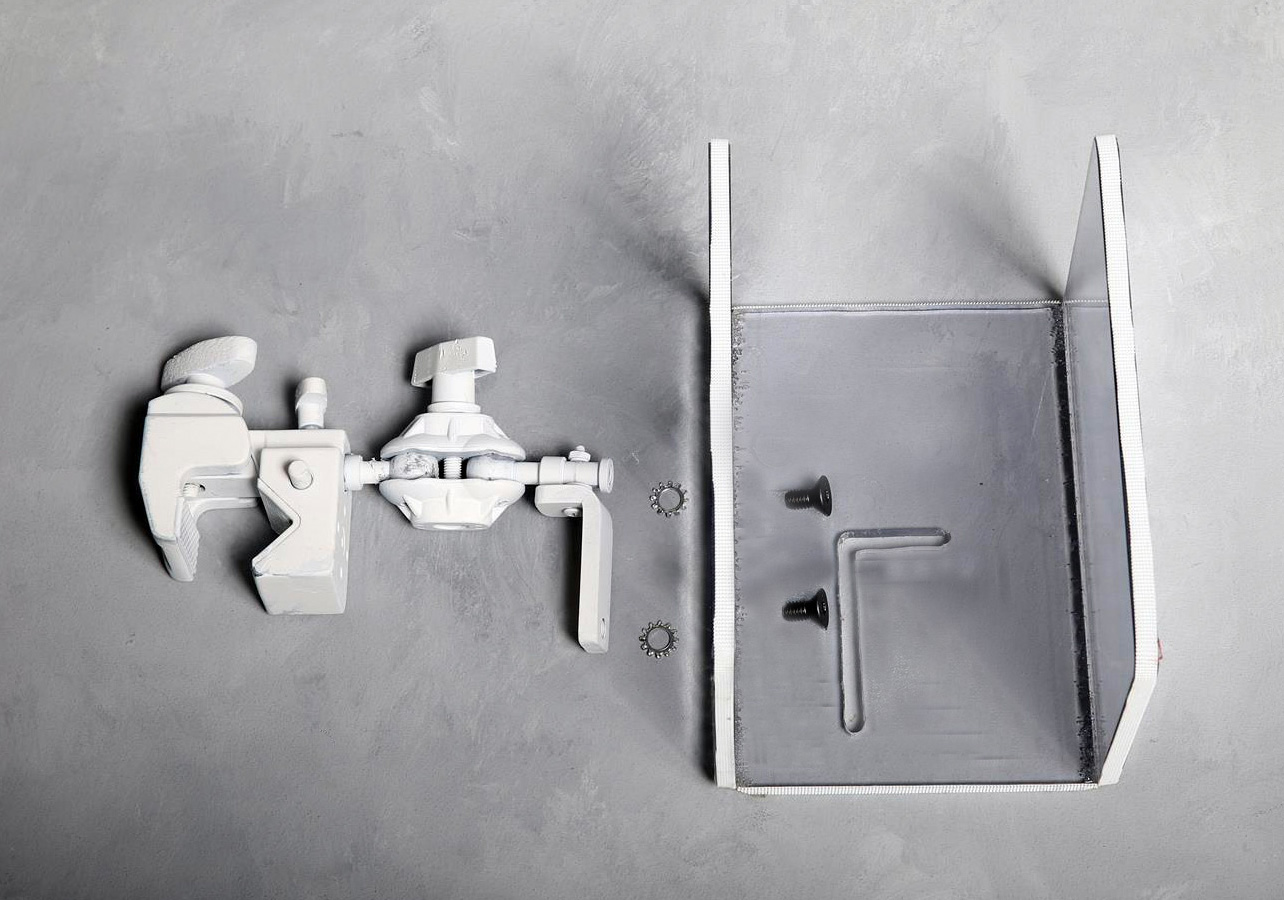
Make special note that the smaller screw goes into the ball head clamp and the larger screw goes into the stabilizing bracket. Tooth washers should be used outside the box between the box and the clamp assembly.
This also allows the Netcam to hug the center post tightly remaining a decent distance away from the goaltender.
The procedure that has worked best for us, is to follow the following steps:
1. Attach the base to the clamp assembly head using any pair of holes...either underneath or behind the box. Use the two screws with the tooth washers between the plastic and the clamp...NOT on the side of the polycarbonate closest to the camera.
2. Attach to the center post and roughly position the glass.
3. Attach the remote to the camera (we just use the tape) and then attach the camera/remote to the glass.
4. A level can come in handy to make sure your lines will all be straight. Tighten all clamps. Tape all settings on the camera and remote. Secure wires with the enclosed tie wrap or tape them down. Keep all wires and remotes away from the face plate as they may be seen by the fisheye lens.
5. Put the Netcam cover on.
6. Use a wrench to tighten all handles. Tighten firmly, but do not over-tighten.
7. Use the provided cloth or any white cloth to wrap any exposed clamps and tape securely.
7. Put in the net...and pray.
If the same net is used for both warm-ups and for the game, set all positioning with your Netcam and then remove it from the super clamp. In that way, it will only take a minute to reattach the entire assembly to the clamp after warm-ups and prior to the game.
WARNING: Under no circumstances should you leave the Netcam in the net for warm-ups. Can you say "target practice"?
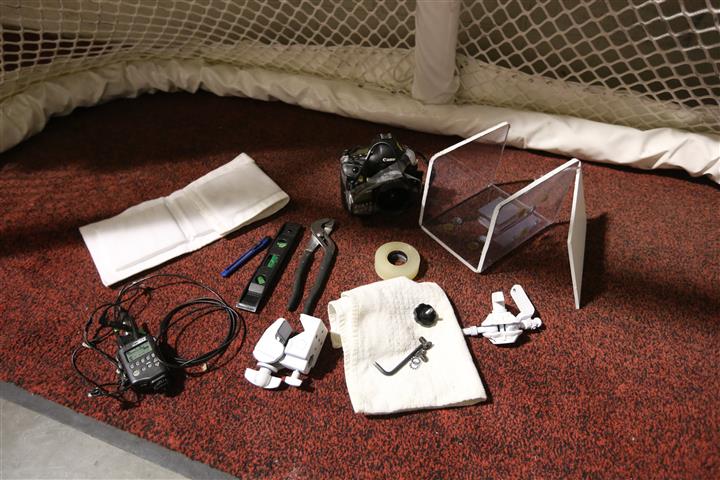
OTHER USEFUL ITEMS YOU WILL NEED FOR INSTALLATION
LOOK FOR THE FLAT - When attaching the ball head to the Super Clamp, there is one side of the spigot that is flat. This MUST line up with the screw to insure a snug fit that will minimize the chance of movement and swivel.
As mentioned above, a Level to try to insure the Netcam is level so that all hockey net bars are aligned properly.
Razor blade or saw to cut the padding on the center post. DO NOT cut the white covering, but rather peel the covering back and cut the black foam pipe wrap. Or simply push all the padding up and attach your super clamp beneath where the padding starts.
Wrench to tighten all parts: (1)The super clamp to the center post, (2) the super clamp to the ball clamp, and (3) the ball clamp itself. Because of the proximity to the base, we have shortened the ball clamp toggle so that the toggle will twist without interference.
We have has a couple of instances of over tightening leading to damage on the ball head toggle. We have enclosed in your package the original handle for the ball head in case you damage the provided toggle, or simply need more torque to get the head tight enough.
TIGHTENING THE BALL CLAMP
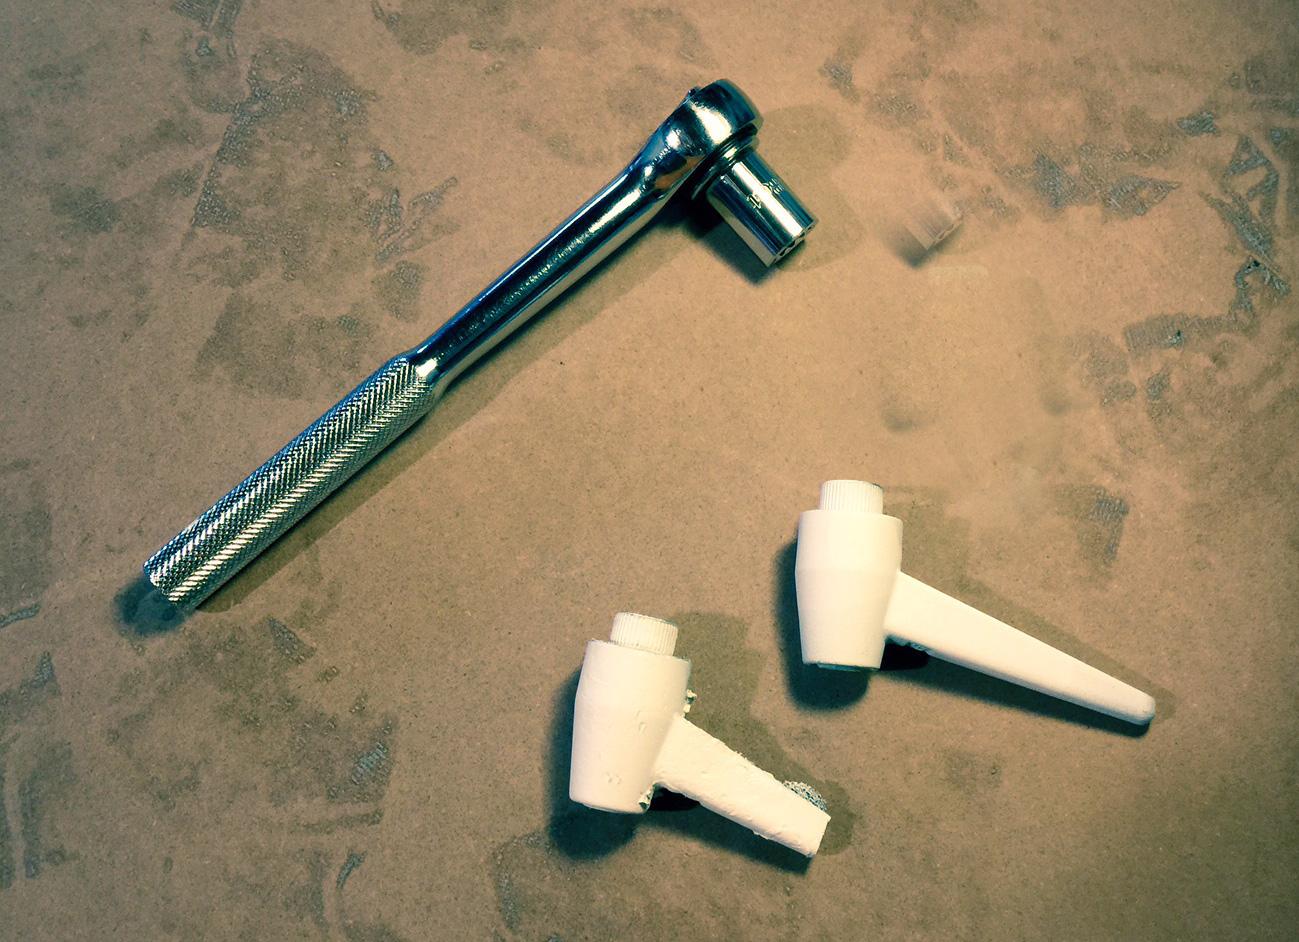
Always seems to be an issue as the weight of the camera/lens/remote puts a big burden on the ball clamp. As of July 2019, we have included an all-metal silver toggle which is attached to the ball head when shipped to you.
There are two other options as displayed in the photo above. Firstly, the toggle which you will find attached to the ball clamp when we ship the netcam. We have included the long handle that was part of the original ball clamp (before we replaced it with the silver toggle). That handle proves to be difficult to use in some situations because of the proximity to the netcam body. Some users use a metal saw and cut the handle in half (as evidenced above). This handle provides a large amount of torque and works well. Make sure you tape off any sharp edges left from sawing.
The last option is the use of a hex wrench with a 13mm 3/8" drive socket along with an 8mm hex nut. It's not pretty, but this works the best.
CAUTION...in handling the polycarbonate. This material is as close to glass as you can get in terms of clarity, and at 3/8" thick the odds of shattering a piece is unlikely. It is extremely important to protect this material from scratches and other markings. Scratches will lead to a lack of sharpness, lack of contrast and starbursts at points of light (arena lights). There are many glass cleaners on the market and most are abrasive and will do more harm than good. As well, plastic cleaners such as boat glass cleaners are not advisable. For Netcam maintenance, click HERE.
Also, use extreme caution when placing the camera and lens in the Netcam and when sliding the camera partially out to retrieve digital cards. We find that this is where most of the polycarbonate scratches occurs. Use a simple piece of cardboard to protect the glass whenever you put the camera in or take the camera out as well as when you slide the camera out to change cards.
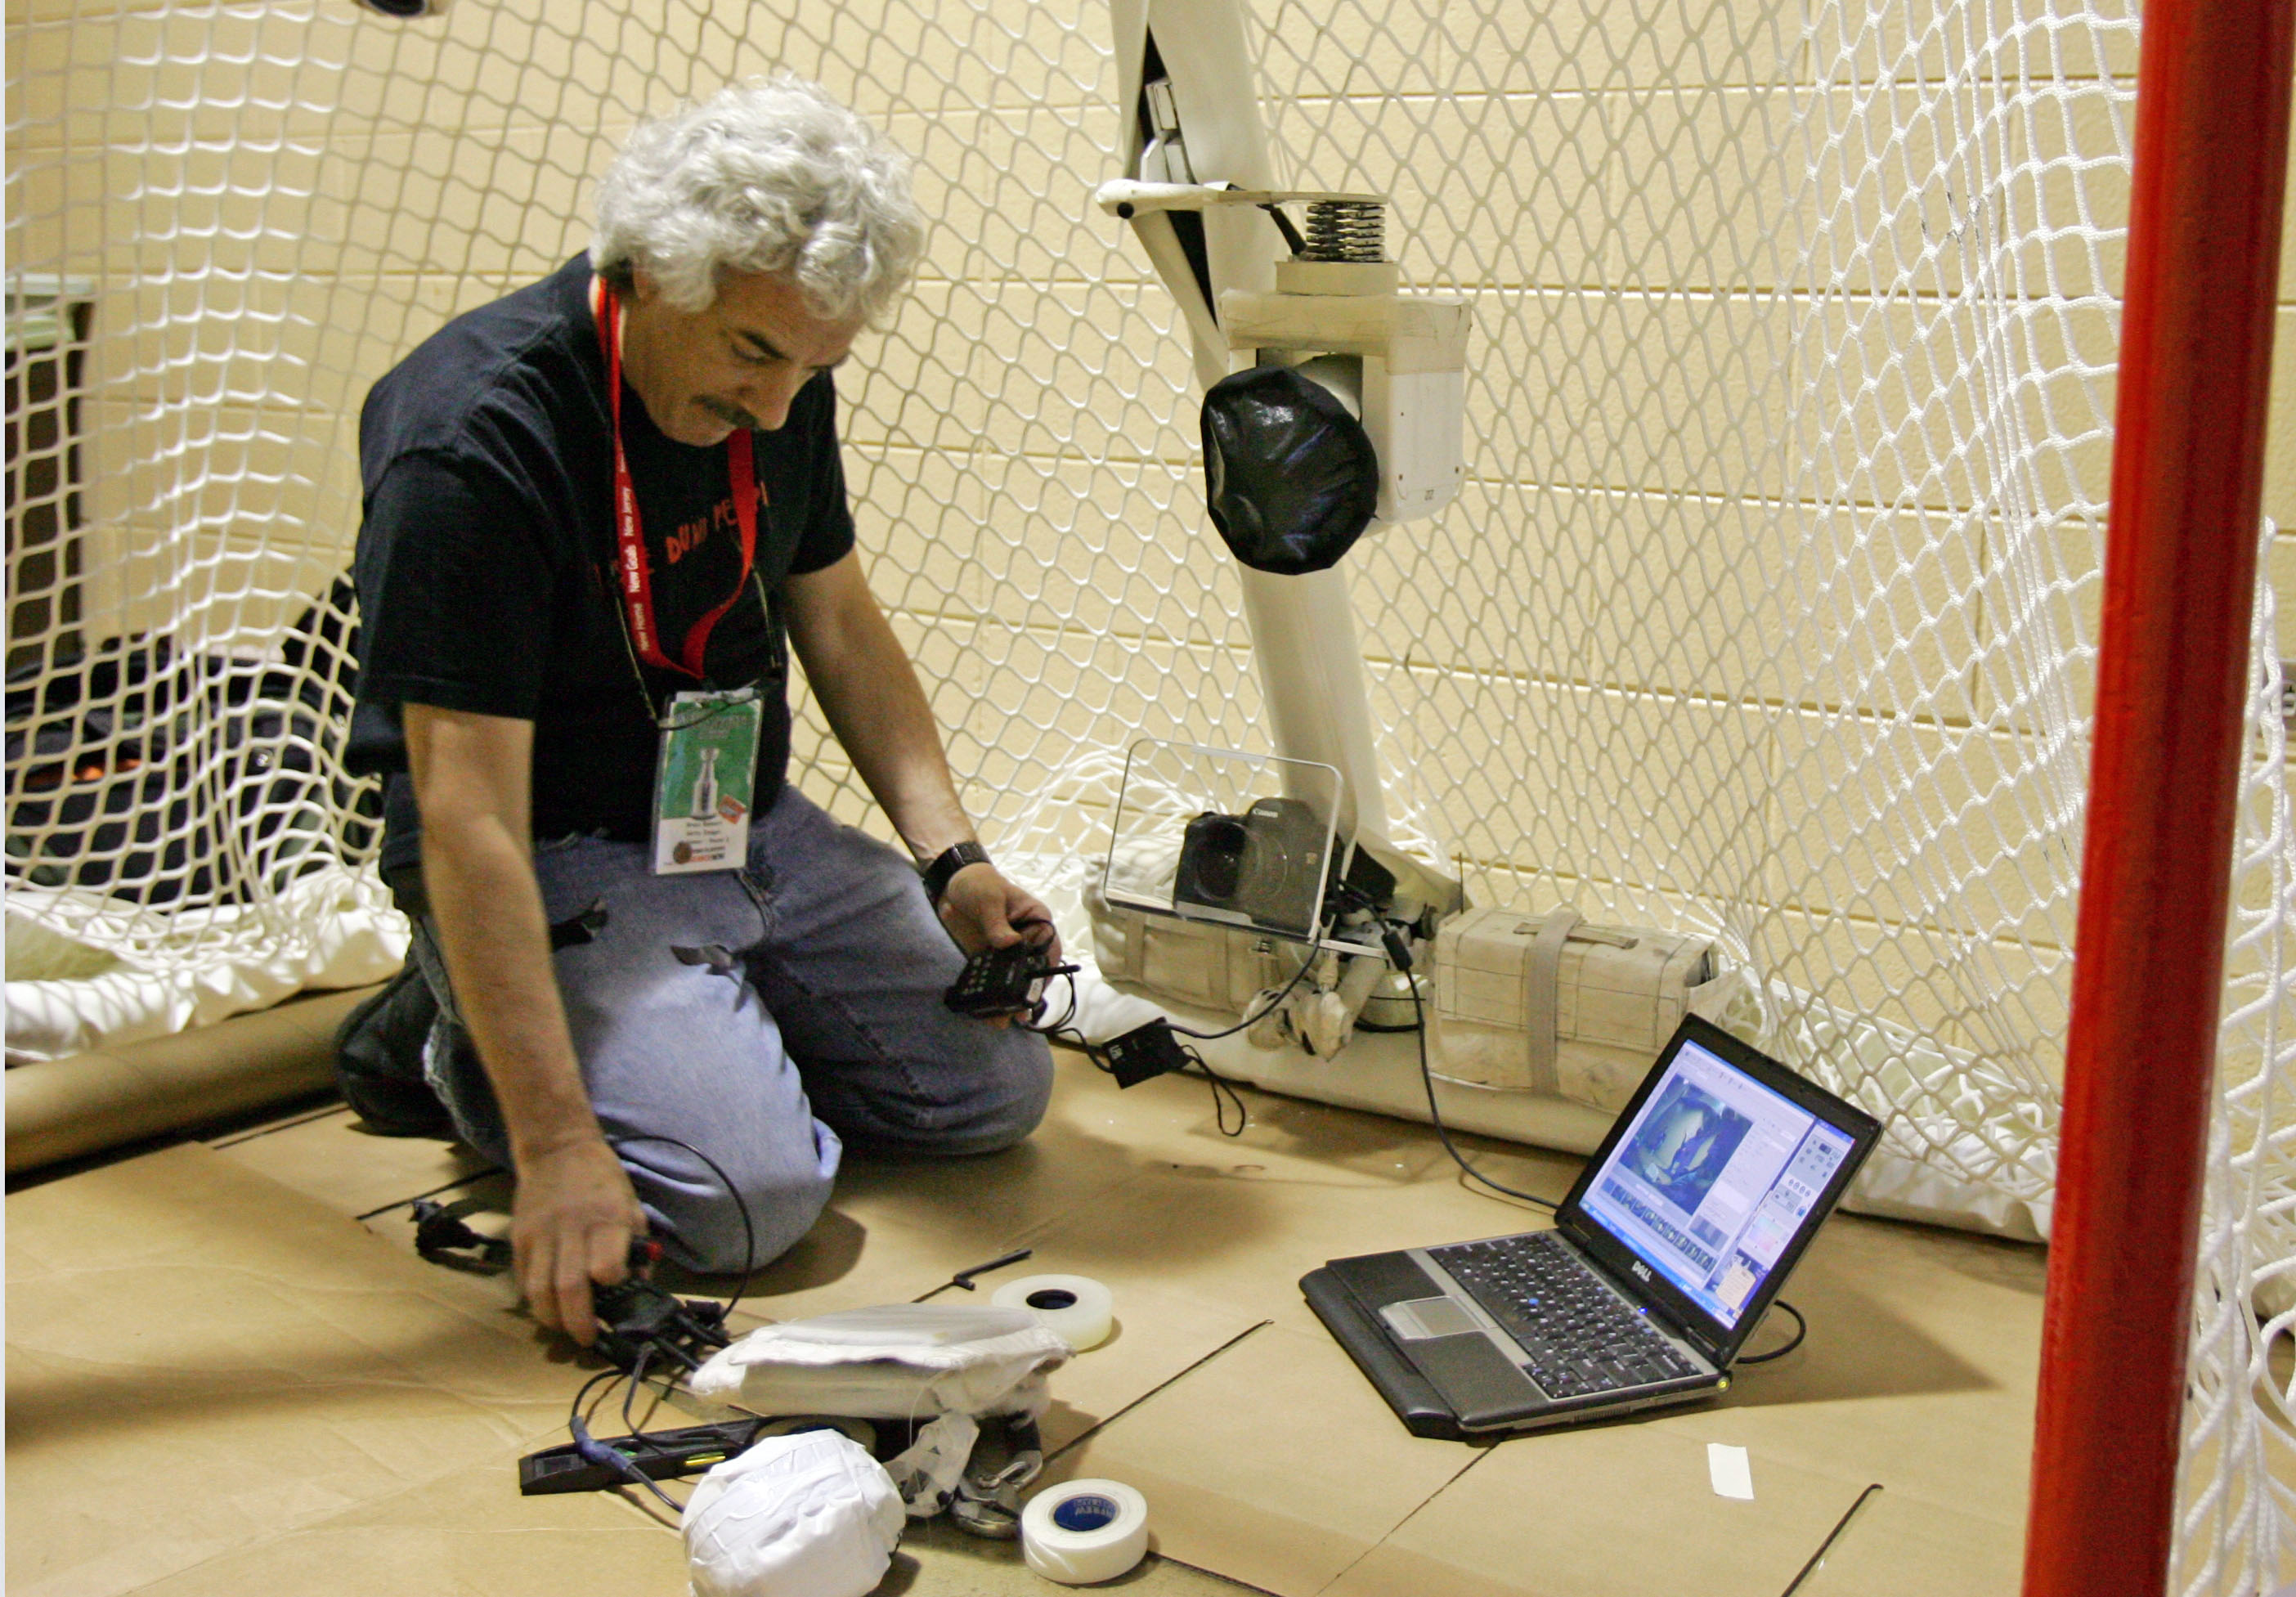
Using a USB cable, Bruce Bennett tethers the Canon 5D to a laptop. Using Canon's "Camera Window" software, the Hockey Netcam is aimed to frame the hockey net. This may be a bit of overkill, as 30 seconds into the game the goalie could kick it out of alignment.
ANY YET...ANOTHER WARNING (Lawyers, Lawyers, Lawyers): The inherent risks of placing photographic equipment in an unsafe environment are the sole responsibility of the purchaser. BBS PHOTO, INC will not be held responsible for ANY damage to photographic equipment, the Hockey Netcam itself, or any bodily injury that may arise to those who come in contact with the Netcam during its' intended use.
This site and all material herein is (C) COPYRIGHT 2023 BBS PHOTO, INC.